How to Import Heroicons into Figma
Tailwind Labs' hand-crafted set, outline/solid/mini.
What is Heroicons?
Heroicons is designed and maintained by Tailwind Labs (the team behind Tailwind CSS). It ships in three variants — 24px outline, 24px solid, and 20px mini — each drawn as a distinct, purpose-built set rather than one style resized.
- Maintained by
- Tailwind Labs
- License
- MIT
- Icon count
- 300+
- Formats available
- SVG, React, Vue
One of the most widely adopted icon sets in the Tailwind CSS ecosystem specifically, and broadly popular beyond it given the quality and maintenance backing.
Strengths
- Hand-drawn per variant rather than one style algorithmically resized, so mini icons stay crisp at 20px instead of looking like a shrunk 24px icon
- Backed by a well-resourced team (Tailwind Labs) with a strong track record of long-term maintenance
- Ships official React and Vue packages alongside raw SVG, so design and code can stay in sync
Worth knowing
- Smaller total vocabulary than the largest libraries (Tabler, Phosphor) — more likely to be missing a niche/specific icon
- Coverage isn't guaranteed identical across all three variants, so a design built around "solid" may not have an exact "mini" equivalent
Good fits
- Projects already built on Tailwind CSS, for a visually matched icon set
- Interfaces that need both an outline and filled state for the same icon (e.g. tab bars, toggles)
- Small UI contexts (20px mini) alongside standard 24px icons in the same interface
Ways to import Heroicons into Figma
Three realistic routes, compared honestly — including where VectaGrid genuinely isn’t the best fit.
Download the official SVGs
Pros
- Full control over exactly which icons you take
- Always current — no snapshot to fall out of date
- Works even when no official Figma file exists
Cons
- Fully manual from there — each SVG needs converting to a component by hand
- No built-in variant structure; you're building that yourself
- Tedious past a handful of icons
Best for: Grabbing a handful of specific icons, or teams building a fully custom variant structure from scratch.
Browse Heroicons on GitHubDuplicate the official Figma Community file
Pros
- Fastest zero-setup route — duplicate and go
- Already organized as real components
Cons
- A snapshot, not a live sync — won't pick up icons added upstream later
- May not match your project's naming or variant conventions
- Hard to merge cleanly with your own proprietary icons
Best for: Using Heroicons's icons largely as-is, without needing to merge them with a custom set.
Open the Community fileBulk import with VectaGrid
Pros
- Imports the whole downloaded Heroicons set — or any subset — in one pass
- Normalizes every icon to a consistent frame automatically
- Builds a Color=Black/White variant set per icon, matching Figma's own one-component-per-icon guidance
- Same workflow whether the source is this library, another one, or your own proprietary icons
Cons
- Free plan caps at 100 icons per import; unlimited is a one-time $39
- Built for monochrome UI icon sets — doesn't preserve original multi-color artwork
Best for: Importing all of Heroicons (or a large subset) as a properly structured component library — especially when combining it with your own icons.
See how VectaGrid works →Walkthrough: importing Heroicons as a structured component library
The steps below cover the bulk-import route in detail, since it’s the one that isn’t already self-explanatory. Steps 1-2 apply regardless of which import method you end up using.
- 1
Download the SVG source files
Clone or download Heroicons’s GitHub repository and locate its raw SVG folder — most icon library repos keep source SVGs in a dedicated
icons/orsvg/directory rather than only shipping compiled framework packages — check the repo’s README if it’s not obvious. - 2
Optimize the files first (optional, recommended)
Icon exports often carry unnecessary editor metadata and excess path precision. Running them through the free SVG optimizer first keeps the source files — and the resulting Figma file — lighter. Not required, but it’s a five-minute step that avoids a heavier design file later.
- 3
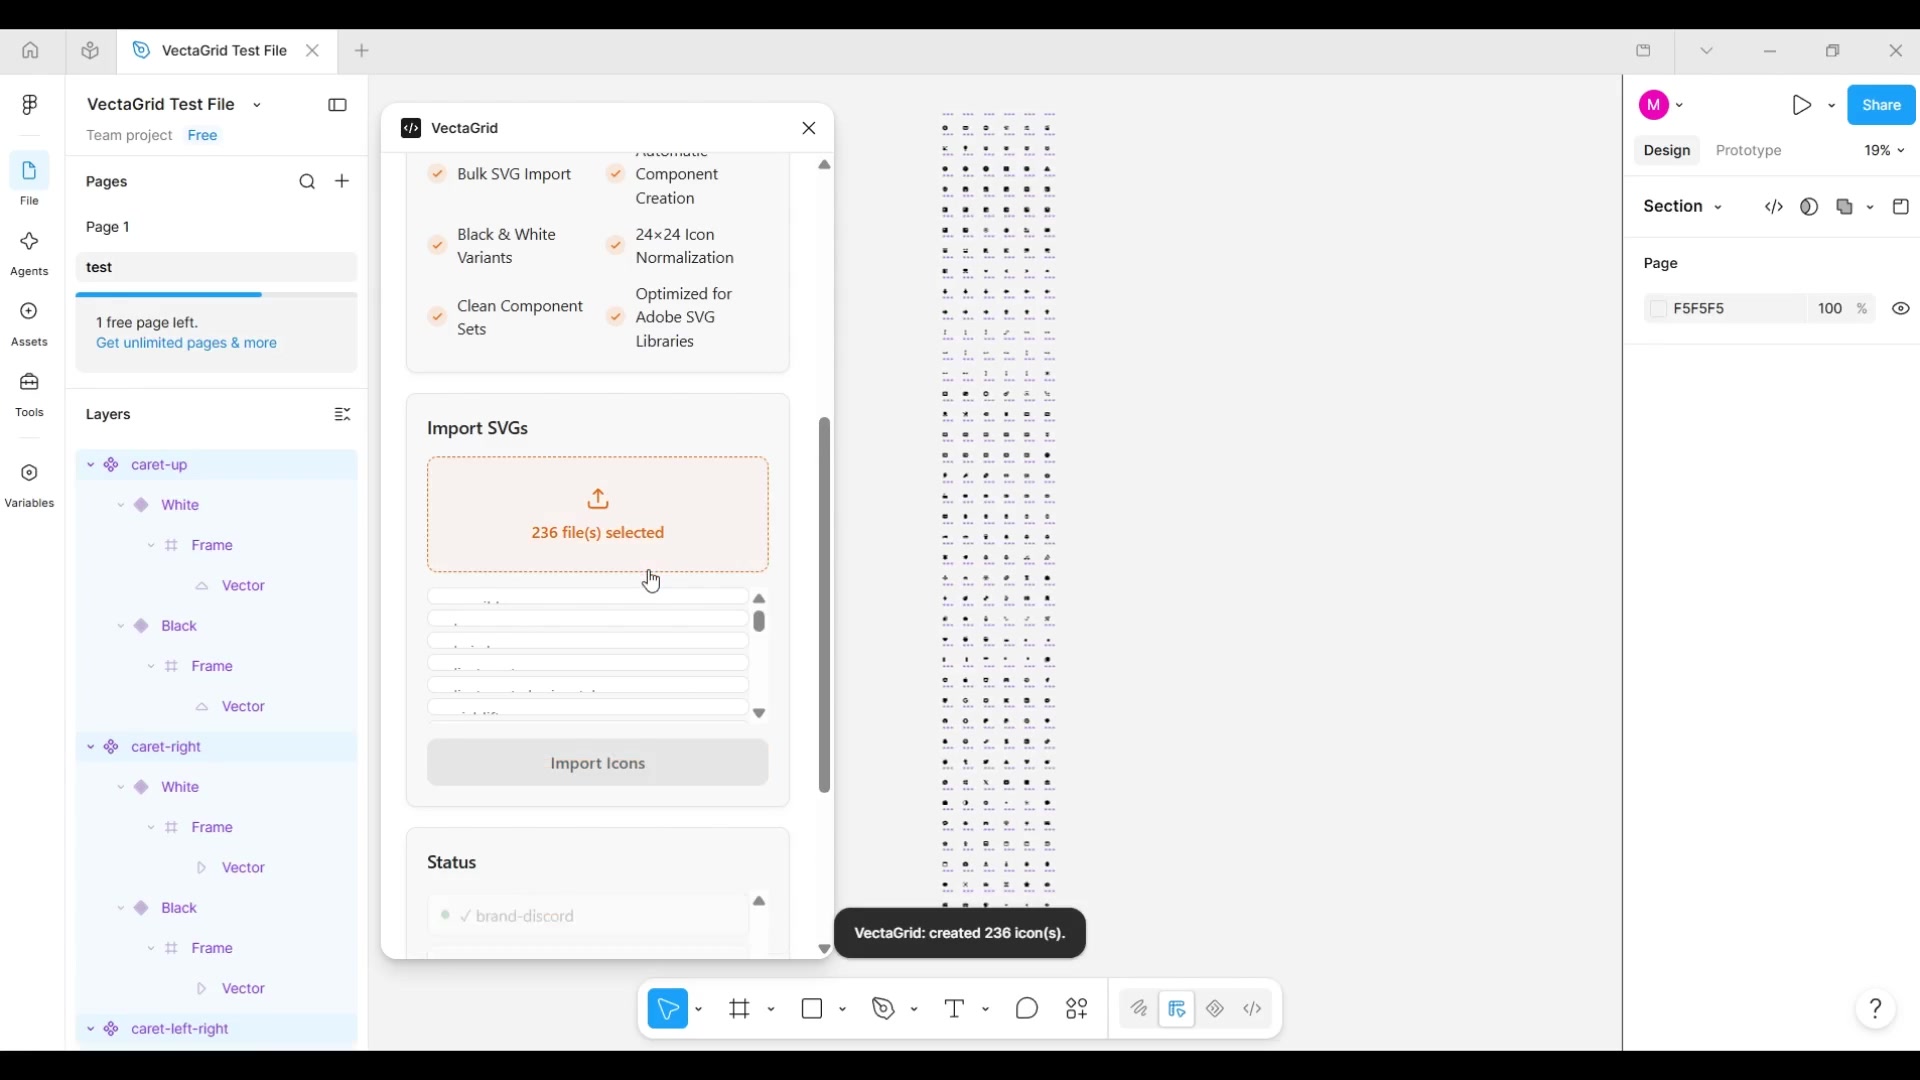
Select the files in VectaGrid
Open VectaGrid in Figma, click the dropzone, and select the SVG files or folder — one file or the entire set at once. Free plan covers up to 100 icons per import; larger sets need Pro or a couple of batched imports.
- 4
Click Import Icons
Each SVG is parsed, centered, and normalized into a 24×24 frame regardless of its original viewBox, then cloned into
Color=BlackandColor=Whitevariants combined into one component set per icon — matching the one-component-per-icon structure Figma’s own documentation recommends. - 5
Review, then publish as a team library
Every generated component set lands arranged in a clean grid on the current page — spot-check a handful of icons, then publish the page as a Figma team library the same way you would for any other component set.
Troubleshooting
- Icons look inconsistently sized after import elsewhere in your file: that’s the source viewBox differences that Heroicons’s files can carry — VectaGrid’s normalization step handles this automatically, so re-check you imported through it rather than a manual drag-and-drop.
- Hit the 100-icon free-plan cap: split the import into batches, or unlock unlimited imports with the one-time Pro upgrade if you’re importing the full set regularly.
- Need a color variant beyond Black/White: VectaGrid currently generates Black/White pairs — for a specific brand color, recolor the generated components after import, or maintain that variant manually alongside the generated set.
Comparing the three workflows
The same tradeoffs apply whether you’re importing Heroicons or any other SVG icon set — this is about the method, not the specific library.
| Dimension | Manual import | Official file | VectaGrid |
|---|---|---|---|
| Setup time | Slow — one icon at a time | Fast — duplicate and go | Fast — one bulk import |
| Scales to hundreds of icons | No — linear manual effort per icon | Only as well as the source file scales | Yes — designed for bulk import |
| Real components (not layer groups) | Only if you manually convert each one | Yes | Yes |
| Consistent frame/variant structure | Only if you build it yourself | As shipped by the library maintainer | Automatic — normalized frame + Color variant |
| Stays current with upstream updates | Yes, if you re-download | No — duplicated snapshot | Yes, if you re-import updated source files |
| Works with your own proprietary icons | Yes | No — official file is that library only | Yes — same workflow for any SVG source |
| Team library maintenance | Manual, ongoing | Manual re-duplication for updates | Re-import + publish, same as any component update |
| Cost | Free | Free | Free up to 100 icons, $39 one-time for unlimited |
Heroicons FAQ
Yes — via the official Figma Community file (duplicate and use directly), the Iconify plugin, or by downloading the SVGs from GitHub and importing them manually.
Related guides
How to Convert SVG Icons to Figma Components
The manual copy-paste method, why it falls apart past a handful of icons, and how to do it properly at scale.
How to Build a Figma Icon Library for Your Design System
Variants, consistent framing, and naming conventions — what actually makes an icon library production-ready.
How to Bulk Import Hundreds of SVG Icons into Figma
Importing an entire icon set at once instead of one file at a time, and what to check before you do.
Related icon libraries
Skip the manual work — VectaGrid does this automatically.
Drop in a folder of SVGs and get a normalized, variant-ready component library in seconds. Free for up to 100 icons.
Questions first? Email support@mosherlabs.dev or see the full VectaGrid page.